
Uploading Photos & Documents
Your book is going to look amazing!
We’ll take you through the steps for uploading the imagery for your book. Further down on this page you’ll find a simple form that will give you a place to upload your digital images and documents.
Not got a Family Book Done For You Package yet? Go here before uploading photos and documents.

Upload Form
People, Events, or Places
Upload your images in bundles called sections, that is by character, place or event. These sections could correspond to folders you’ve made on your computer as well as to part of chapters in your book.
Acceptable image types are JPG, JPEG, TIFF, PNG, WEBP, and PDF.
You can come back to this form multiple times after you click Submit. You’ll need to create new sections. It’s okay to have multiple sections created over several days for the same person, place or event. The designer and you will figure it out at a Family Book Work Session.
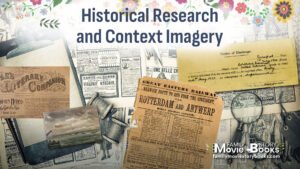
Imagery For Your Book
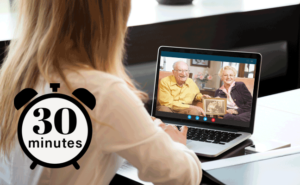
The images and historical documents you upload will not only make the pages of your family book compelling and interesting, but they could also make your interviews easier. During your interview, having shared relevant imagery with the interviewer can be useful in jogging the brain, remembering stories and details, and accessing feelings, traditions and values.
To be clear, anything that isn’t text is an image. These can be digital photos and documents like census records, ship manifests, birth and death certificates, military’s records, letters, hand-drawn family tree charts, and more. Even items like clothing, baby shoes, jewelry, linens, fabrics, trophies, medals, and household objects can make for rich visual imagery.

Digitizing Paper Photos
Sorting
Depending on whether you’re working with photographs that are loose prints or maybe they’re glued into albums, you’ll want to do some initial sorting. It can be tempting to digitize every single paper photo you have and think that you’ll sort it all out later once it’s all in your computer. But as you start reviewing the images you have you’ll notice there’s typically multiple shots of the same thing or copies of the prints.
For loose paper print photos, put away the ones that won’t be going in your book, at least not in the first edition. You add to your book with the extra images later. Then start tossing the photos into piles, envelopes, or cardboard file folders. The best initial sorting is by person, or event, or place, or chronologically. After they are digitized, you’ll get to do more sorting of the digital images.
For paper print photos in albums that can’t or won’t get out, use sticky notes to indicate which images you intend to digitize. Do a quick flip through the album and add a sticky note only to images that should end up in your book. If in doubt, include it.
Using a Scanner
Although digitizing paper photos with a modern scanner isn’t difficult, it does require focus and dedication. There are many services that will scan the images for you and give you back a USB memory stick or perhaps an online folder full of digital images. Before you decide to digitize the images yourself, consider doing a little research for reputable vendor because your time is valuable too.
If you’re doing the scanning, you’ll need a scanner that can create a scan between 300 and 600 dpi (dots per inch). Many scanners can scan up to 4800 dpi but we don’t recommend that much resolution because the scanner goes very slow to create that pixel depth and the image files are digitally enormous. 600 dpi is perfect for most images.
You can access your scanner’s setting in its software interface once it’s set up and running. It is crucial that you ensure that your dpi settings are correct because if it defaults to a lower resolution your prized images are likely to appear pixelated, grainy, and ugly in print.
Smartphones, Tablets and Digital Cameras
If you’re using your smartphone, tablet or a digital camera to acquire digital images of your paper prints you’ll want to make sure your settings have the camera at its highest megapixel setting. You can always downsize very large images later. But you usually can’t easily add resolution or dots. If you haven’t got enough data at the beginning there’s no way to add more resolution later in a way that actually allows your image to continue to look good.
Shooting old paper prints with your smartphone or a digital camera is actually quite easy and will produce good high resolution images. It all comes down to lighting. Several pitfalls need to be avoided with digitizing paper print photos with your camera. Those problems are glare, brightness, & blurriness.
Getting The Light Right
Let’s deal with glare first. If you see in the middle of your digital photo a large blob of white it’s probably glare from a bulb, lamp, or flash that is a reflection off the shiny surface of the paper print photo. This happens most commonly when trying to photograph print photos at the dining room table or the kitchen table. Often there is a chandelier or a light fixture suspended over the table or recessed in the ceiling. Those lights are most likely to cause glare on your image when you’re photographing. You do want lots of light on your paper print photographs but your best solution is to turn off the overhead lights. That will immediately remove any glare appearing on your paper print photos.

Lighting
The best solution is to position your paper print photos so that the light is illuminating them from the side. If you’re using lights or lamps on stands then you would want to have those lights on either side of your flat surface where your photos are laying out and have the light of those lamps shine at about a 45° angle onto the paper prints. Because the lights are not shining directly down onto the photos there should be very little glare on the photos. They will be beautifully illuminated. If you don’t have lights on stands, even some basic lamps will do the job. You may need to grab some extension cords in order to reposition those lights. Watch out that you or someone else doesn’t trip over the cables.
In the absence of any extra lighting, another really useful way of digitizing paper print photos is to get near a window during the daytime and shoot them with your camera. You don’t want direct sunlight on the photos but being near where the indirect light is coming into a room from a window will give you that angled light without any glare on the surface of the paper print photo. Slide your table nearer the window and experiment with various positions in the room until your paper print photos are illuminated beautifully. You may need to shift the table every hour as the sun moves through the sky.
Most smartphones have gyro devices in them so you want to closely observe your phone camera interface to make sure the camera has the right orientation. If you don’t you’ll find that your digital images are all on their sides and need to be rotated 90 degrees, a task that can take extra time.
Once you’ve shot your digital photo of your paper prints, transfer the photos to your computer, or upload them directly using our upload form below.
Let us know if you need support in having your physical images digitized.
Developing Pictures
Correcting blur, brightness, and contrast
Despite being digital, images may still need some correction called “developing”, just like in the old film days.
Our designer will do a certain amount of correction to brightness, contrast, saturation so you don’t actually need to do anything.
But if you do want to do some developing of your digital photos here’s a few tips. Commercially available software like Adobe Lightroom or Photoshop or Affinity Photo or ACDSee Photo Studio Ultimate have specialized tools to get the best look out of your photos. Even the free photo editor program called GIMP can do a pretty good job.
Also your computer may have some built-in photo adjustment software. On a Mac be cautious of importing all your images in their application Photos For Mac to do developing because you’ll then need to export all the photos out again to be able to share them for your book design.
When it comes to developing digital images of old paper prints, they are often faded and the colors don’t look right. For dealing with a faded image boosting the blacks through contrast or dehaze can produce excellent results. Many times the original photo itself wasn’t correctly exposed so you may need to add more brightness, while working to keep the blacks crisp. Colors can be adjusted with white balance or adjusting specific bands of color. Slight blurriness can be corrected with some unsharp mask or sharpening, but if the original photo was out of focus, there’s not much that can be done to fix that.

Sorting, naming, culling
Simple File Management
Organization is the name of the game when working with digital photo collections and historical documents.
While you can do some of this work on your tablet or smartphone for the most part they don’t usually have the storage capacity nor the functionality to adequately manage your collection.
Simply using the native file management system in a Mac (Finder) or a Windows computer (File Explorer) you’ll be able easily create folders, sort and move around images, and then upload them directly into our system.
Folders for People, Events, or Time Periods
We recommend that each character who is going to be in your book gets their own folder on your computer. As well, any event, place or time period that doesn’t relate to a specific character should have its own folder too.
Then you simply drag and drop the digital images into the correct folders.
Within those folders you will need some subfolders. A subfolder is just a folder inside a folder. This is useful for bundling images of children and in-law spouses. For example inside your maternal grandmother’s folder you might put a folder for each of her children: one for your mom and a folder for each of her siblings, your maternal aunts and uncles.
Descriptive Names for Images
Regardless whether you digitized the photo with your scanner or smartphone or had someone else digitize the prints for you likely each image is stored with a name that doesn’t mean very much. It’s often the date of scanning or a sequence number. None of those identifiers are useful for your family book design.
With both Mac Finder and Windows File Explorer you can easily edit the digital image file names. The only trick is not to delete the usual “.jpg” or “.jpeg” extension that’s at the end of the file name.
It’s suggested that you edit the digital image name to match the main character(s) who are visible in the photo. You might rename the digital photo first and then move it into the character’s folder.
Don’t use relational names
We strong urge you not to rename all the digital images of the woman who gave birth to you as “mom1.jpg” and “mom2.jpg”. In genealogical terms, that woman is also someone’s daughter and sister and wife, etc. Plus if you have other cousins sending your picture of your mother’s siblings they might do the same thing and label them all “mom1.jpg” and “mom2.jpg”. That’s a recipe for confusion.
Basic Naming
Instead use complete names of people. For women we recommend using their maiden name as their surname. For example a photo of Mary who was born in the Smith family but married John Jones would be identified as “MarySmith1.jpg”. Adding a number on the end is wise because when you’re naming multiple digital images of the same person you can copy/paste the first part and peck in a new number at the end and be quite efficient.
Advanced Naming
If you know specifics about a person like their age at the time the photo was taken or the location or event you can add that into the file name. For example you know that the photo Mary Smith was her high school graduation photo taken in 1952 in New York you might rename the image file like this: “MarySmith-HighSchoolGrad-1952-1.jpg”.
Because you might be sharing your digital photo collection with loved ones, renaming the images with explanatory info will be greatly appreciated by them someday. And your Family Book Done For You project will likely go very smooth if you labeled your images intelligently.
Group Shots
If you’re lucky to have gorgeous group photos containing many esteemed ancestors, naming them can be a little tricky. Our suggestion is rename the group shot by the surname of the majority of the family members shown or after the eldest relative in the shot. For example a digital photo of Mary’s grandmother (whose maiden name was Elizabeth Brown) with all her siblings might be named “ElizabethBrown&siblings-1.jpg”. Or maybe you list the sibling names too: “ElizabethBrown&siblings-John-David-Phyliss-Martin-1.jpg”
One last note about group shots: As much as possible the convention for identifying people in group photos is by the rows and from left to right. Start with the front row and go from left to right. If there’s someone you can’t recognize, list their name as X. For really large group photos, chat with your designer at Family Book Work Session to determine what’s required.

Culling
With digital images it’s easy to group like shots together and compare them. Decide which ones to keep and which ones to cull. Make your choices by content, quality, and digital size.
Images that are the best content are the ones where people’s eyes are open, the picture is interesting – not confusing, and it is relevant to those stories that will be told in your book.
Images that are high quality are well composed, sharply focused in the original print, and look good.
Images that are high resolution – large in pixel size and bytes – are going to print better. If you have a choice between a large image and small thumbnail, lose the thumbnail.
Rather than deleting extra images, drag them into another folder called “Unused”. That way later if you change your mind about the image you don’t have find the paper print and rescan it.
Uploading Digital Images
For the upload form below acceptable image types are JPG, JPEG, TIFF, PNG, WEBP, and PDF.
Add your first name, last name and the same email address that you used to purchase Family Book Done For You.
Then type in the Section field a person’s name, a place, or event to create a folder to hold the image(s).
For example for Mary Smith’s images you would type “Mary Smith” in the section field. Then use Choose Files to access the folders on your device, locate the images and upload them.
To upload images for another person, place, or event click the button “Add Another Section” and repeat the process.

extras
There’s always more to do on great works of art . . . they’re never really done! To give you added possibilities upgrade your package with these deluxe services.
-
 Rated 0 out of 5$100.00 – $330.00Select options This product has multiple variants. The options may be chosen on the product page
 -
 Rated 0 out of 5$399.00 – $1,299.00Select options This product has multiple variants. The options may be chosen on the product page
 -
 Rated 0 out of 5$250.00 – $1,299.00Select options This product has multiple variants. The options may be chosen on the product page


FAQ's
Yes, we can interview anyone else who can help tell your family stories. It could be your grandparents, aunt, uncle, cousins or others. Additional interview and writing charges would apply. Additional book design charges would also apply to include the new interview text in your book.
Most interviews take at least an hour to obtain useful and interesting story text. Our packages include enough time for one or two people to be interviewed. Some people have good days and bad days so multiple interview dates helps you get the most complete story gathering.
All of our books are designed as 10” x 8” either portrait or landscape. Additional book sizes and orientations are available. We’ve also got several styles of design that you can choose from which will be shared with you once you’ve ordered your package.
Yes upon completion of the design, you’ll own the full rights to the book and its content. If you plan on selling the book please let us know at the beginning of the process so we can help you review copyright issues and release Family Movie Story Books from any liability.
If you’re the person arranging the project for your parents, you may need to remain involved in the project, depending on how techi your parents are. For example, you may need to help with uploading digital images, reviewing text before the book is designed, or reviewing versions of the designed book.
We have several beautiful book design templates that you can choose from. Each one has different colors, typefaces, treatments and styles.